Zoho Mail: Improve Team Visibility with Locations in the Admin Console
Hello Everyone
For administrators, knowing where each user is located helps in better management and smoother operations.
The Locations feature in Zoho Mail helps you group users based on their office or work location, making it easier to manage distributed teams.
What is the Locations Feature?
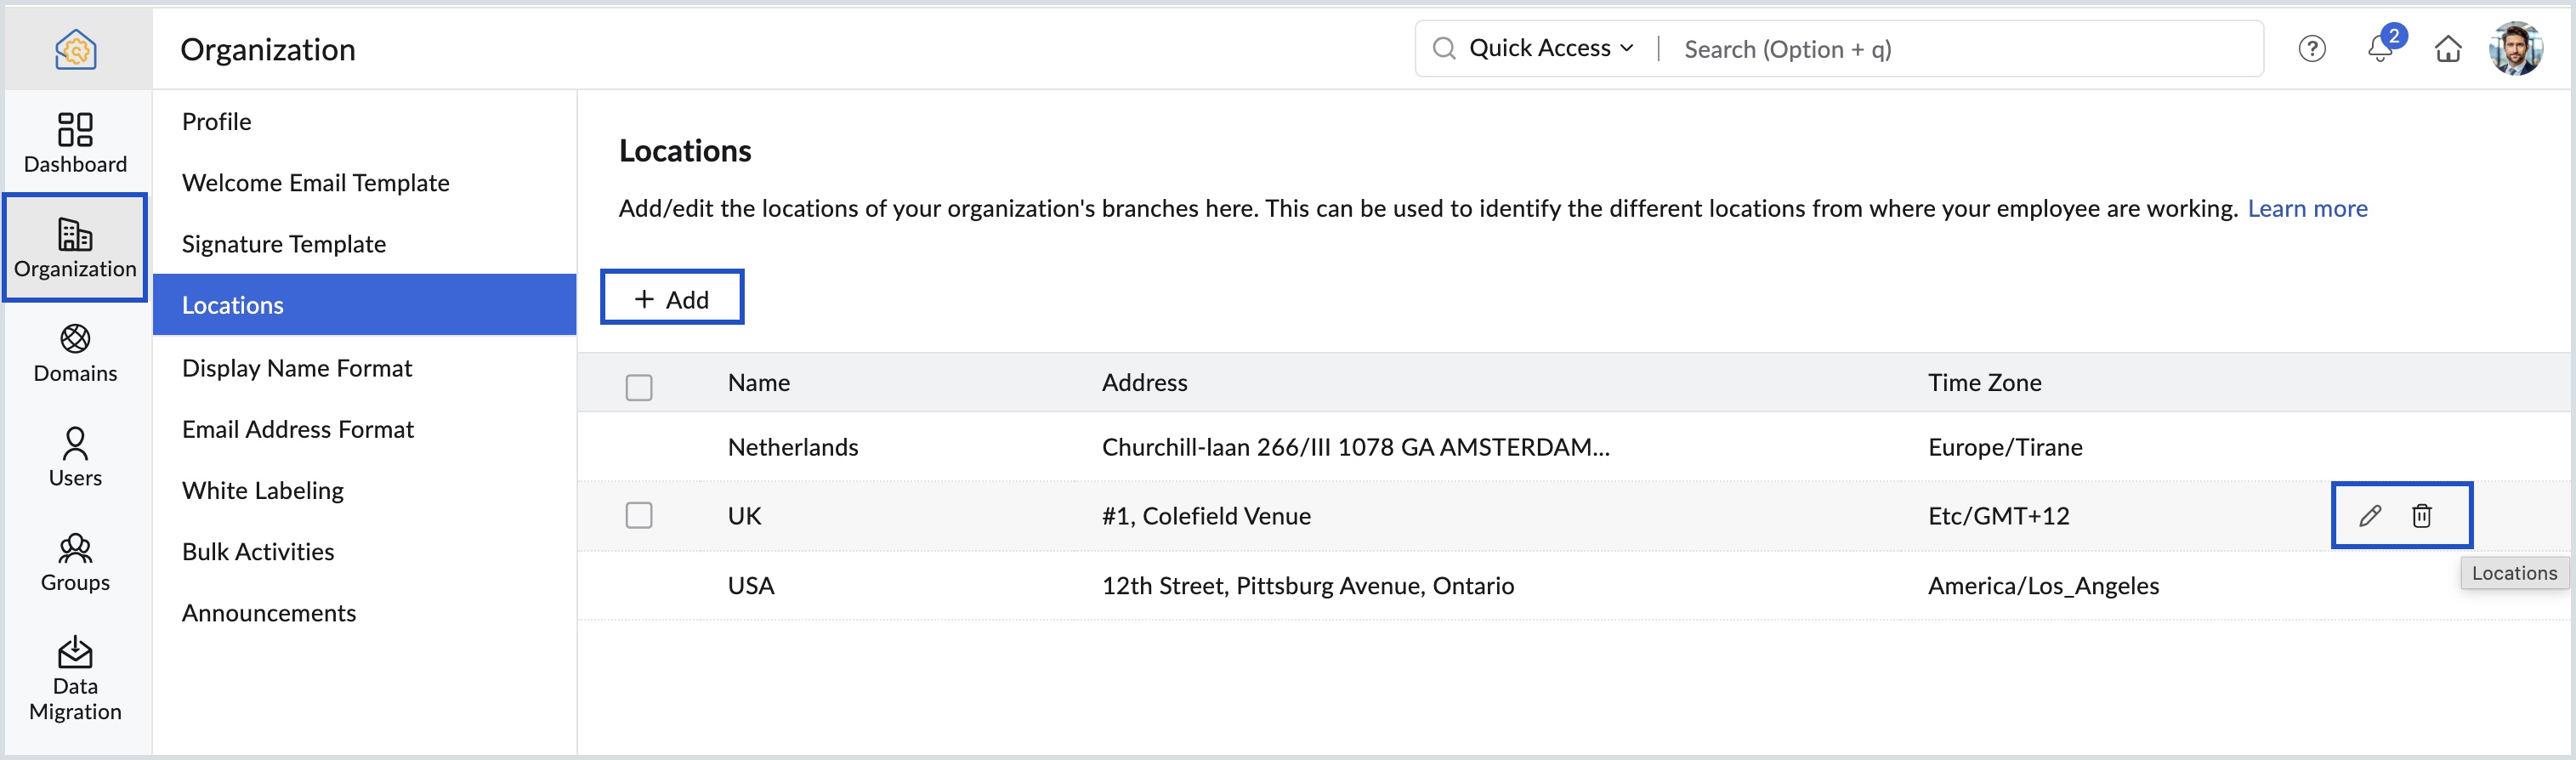
The Locations feature in Zoho Mail Admin Console allows admins to add and manage different office locations of their organization.
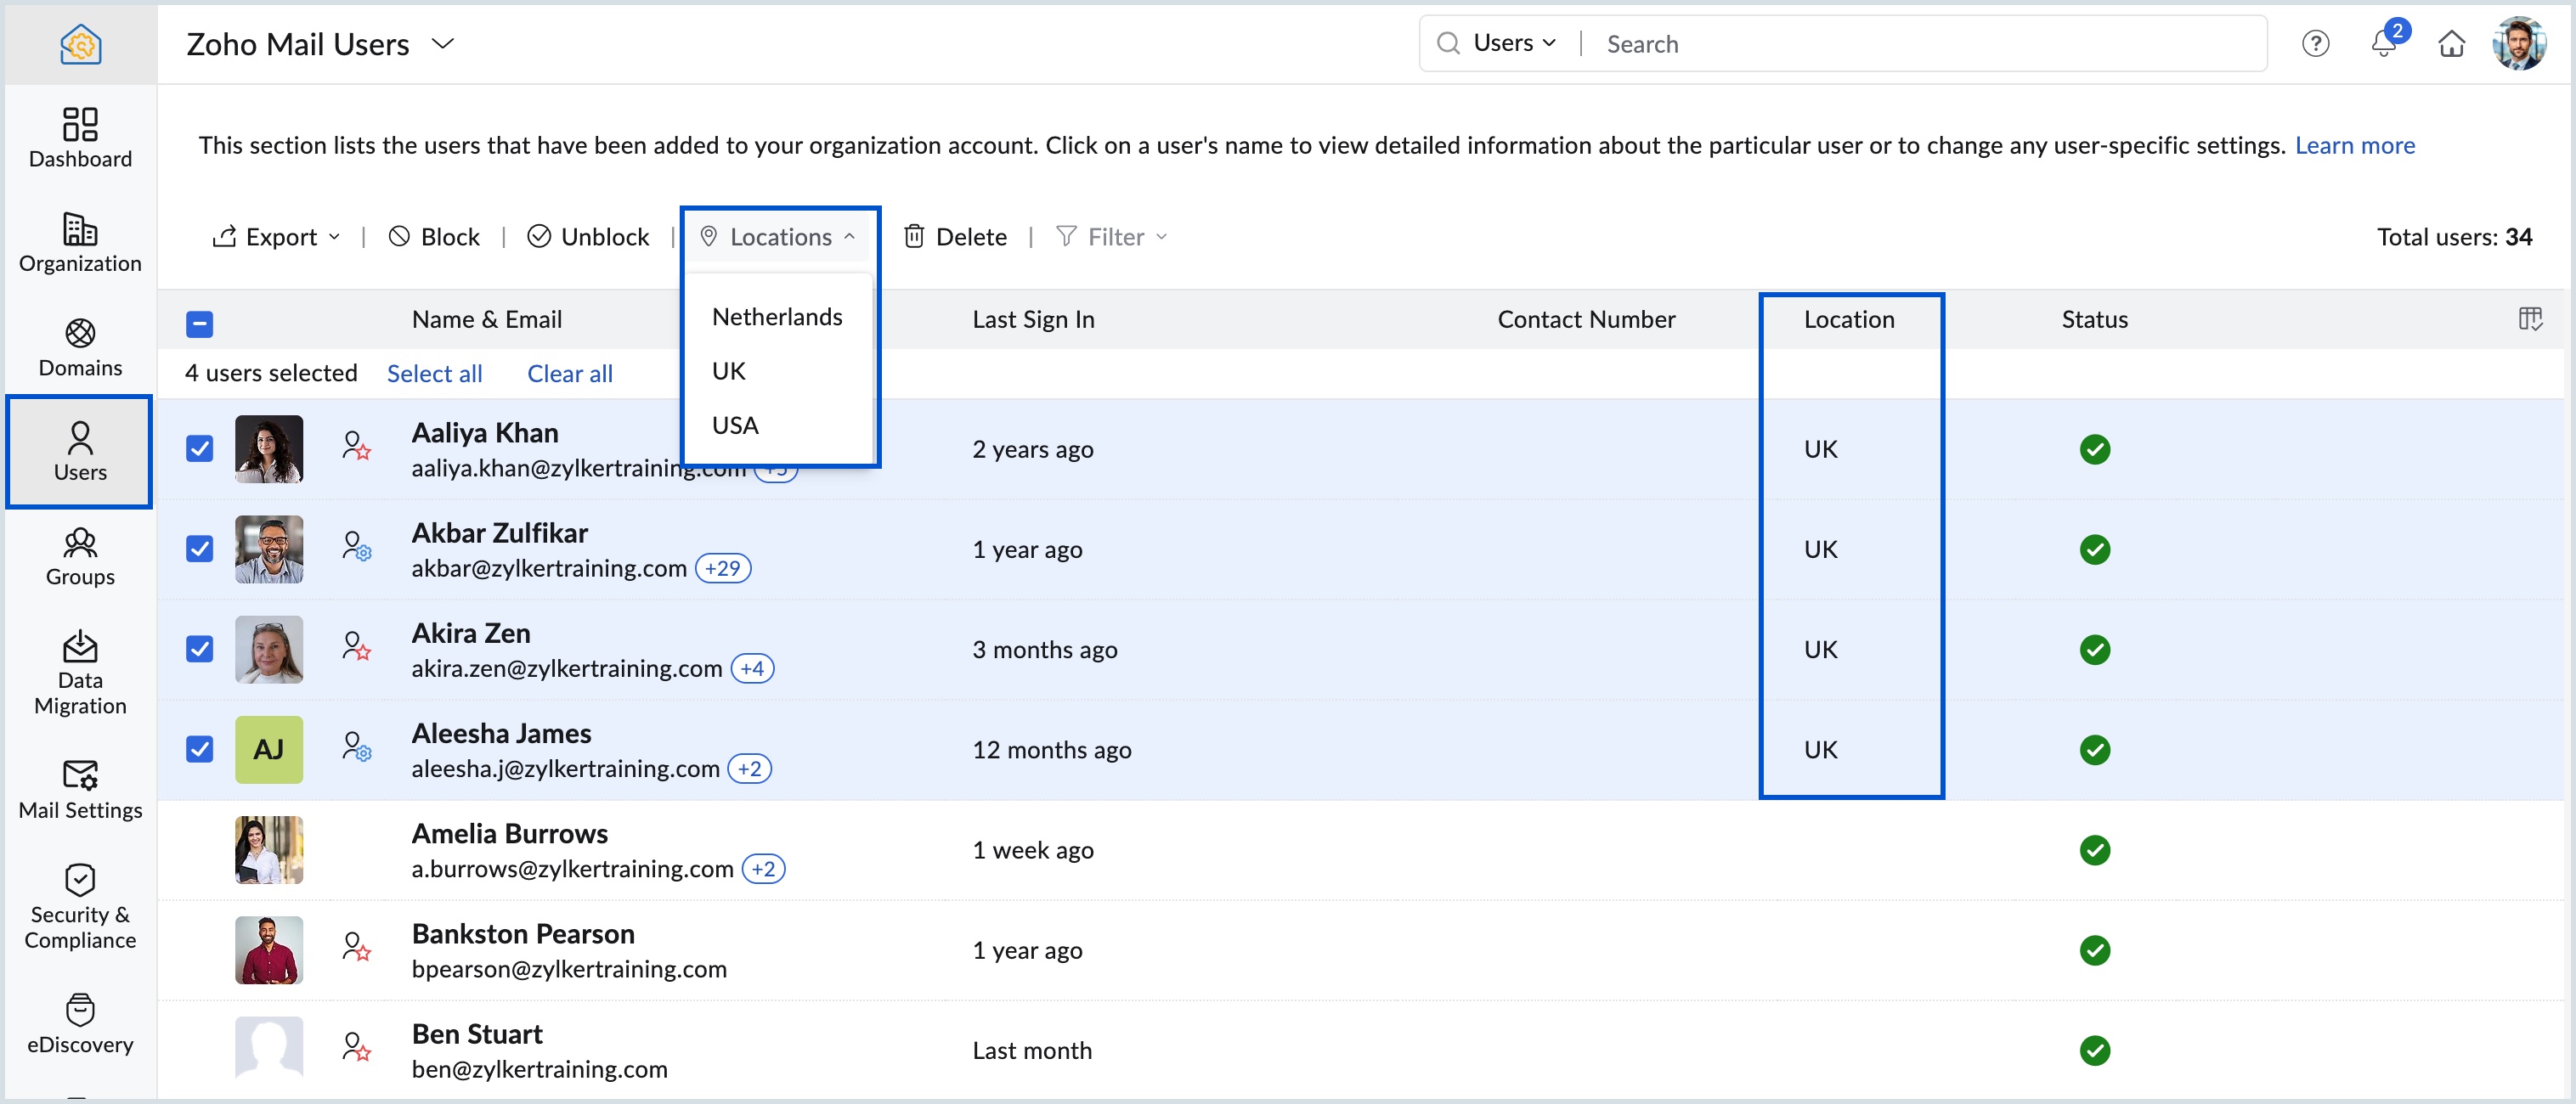
Once locations are created, they can be assigned to users, so you can easily see where each employee is working from.
Key Use Cases
- Branch Management
You can add details like office name, address, and time zone to keep a clear record of all your locations. - User Assignment
Locations can be linked to individual users, helping you quickly identify where each team member is based. - Accurate Time Zones
Each location can have its own time zone, which helps in better scheduling and communication across teams. - Bulk Updates
- You can select multiple users and update their location at once, which is useful during team changes or restructuring.
Why It Matters for Admins
- Better Visibility
Admins get a clear view of where employees are located, which is useful for reporting and management. - Easy to Scale
As your organization grows, you can add new locations anytime without affecting existing data. - Flexible Changes
User locations can be updated anytime, making it easy to handle transfers or office changes.
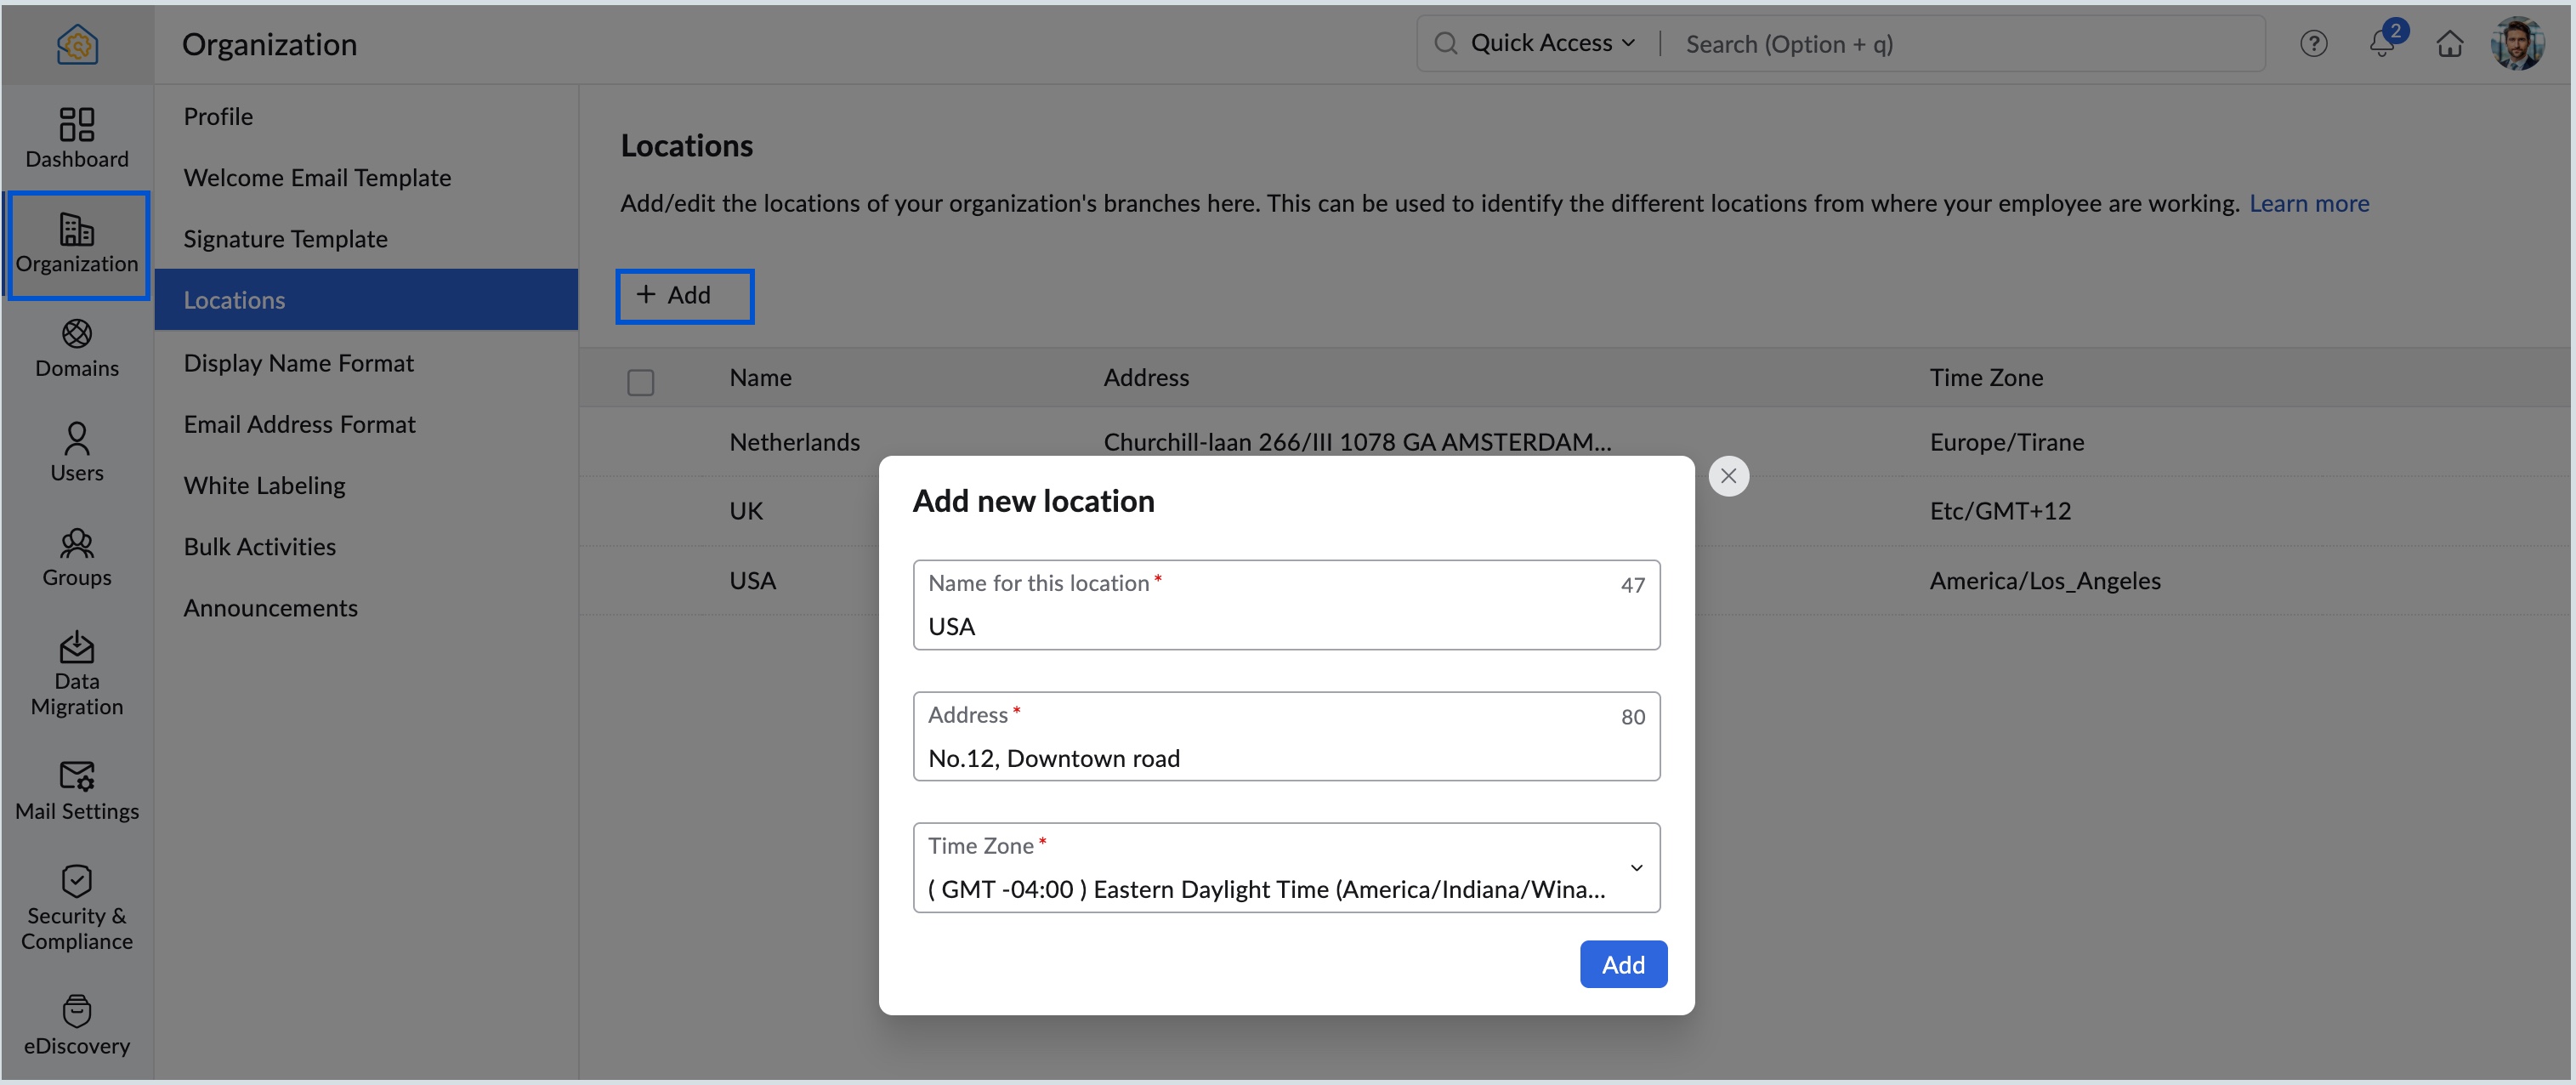
Steps to Add Locations
Follow these simple steps to create a new location:
Log in to Zoho Mail Admin Console
Go to the Organization section
Open the Locations tab
Click Add (or create your first location)
Enter the location name, address, and select the time zone
Click Add to save
You can also edit or delete locations anytime as needed.
Related Articles
Zoho CRM : Compliance Made Easy for Email Authentication
We are introducing you with significant updates to enhance email authentication and verification processes across Zoho CRM and other Zoho services. These changes aim to bolster security, ensure compliance with industry standards, and improve user ...Introducing Zoho Service Plus : A unified platform for customer service - Early Access for Partners
We are excited to announce early access to Zoho Service Plus, a unified platform that brings together all of our customer service applications into a single platform. The early access program is exclusive only to partners. With Service Plus, manage ...Zoho Mail - a smarter and quicker emailing experience with Zia's OpenAI integration
11Like7234 OpenAI and ChatGPT have taken the world by storm so much that these are household terms now. Zoho, as always, has embraced this new technology with teams coming up with creative ways to make the most of the generative AI capabilities. Zoho ...Zoho Desk: 2-Year Data Analytics in Zoho Desk
Zoho has announced a much-anticipated feature in Zoho Desk. A select group of users now has early access to the "2-Year Data in Analytics - Reports" feature, allowing them to create reports using data from the past two years. Enhanced Reporting ...Zoho Analytics 6.0 Beta: A New Era in Data Analytics
Zoho has introduced Zoho Analytics 6.0 Beta, a significant upgrade tailored to the diverse needs of business users, data analysts, data engineers, and data scientists. This version incorporates extensive user and market feedback, offering innovative ...