Zoho Mail: Fix Email Delivery Issues by Verifying DNS Records
Hello Everyone,
Or faced a situation where emails sent from your domain were rejected?
Why does this happen?
Most of the time, this issue occurs because your domain’s DNS settings are not properly configured or verified with your domain provider.
What are DNS records?
When you purchase a domain from providers like GoDaddy, Cloudflare, or BigRock, you must add the correct DNS records for your email service.
These records help ensure proper email delivery and protect your domain from misuse.
The main DNS records include:
MX Record (Mail Exchange)
This tells the internet which mail server should receive emails for your domain.
SPF Record (Sender Policy Framework)
This specifies which servers are allowed to send emails from your domain. It helps prevent email spoofing.
DKIM Record (DomainKeys Identified Mail)
This adds a digital signature to your emails to confirm that the message content hasn’t been altered.
DMARC Record (Domain-based Message Authentication, Reporting & Conformance)
This works with SPF and DKIM. It tells receiving servers what to do if authentication fails — allow, quarantine, or reject the email.
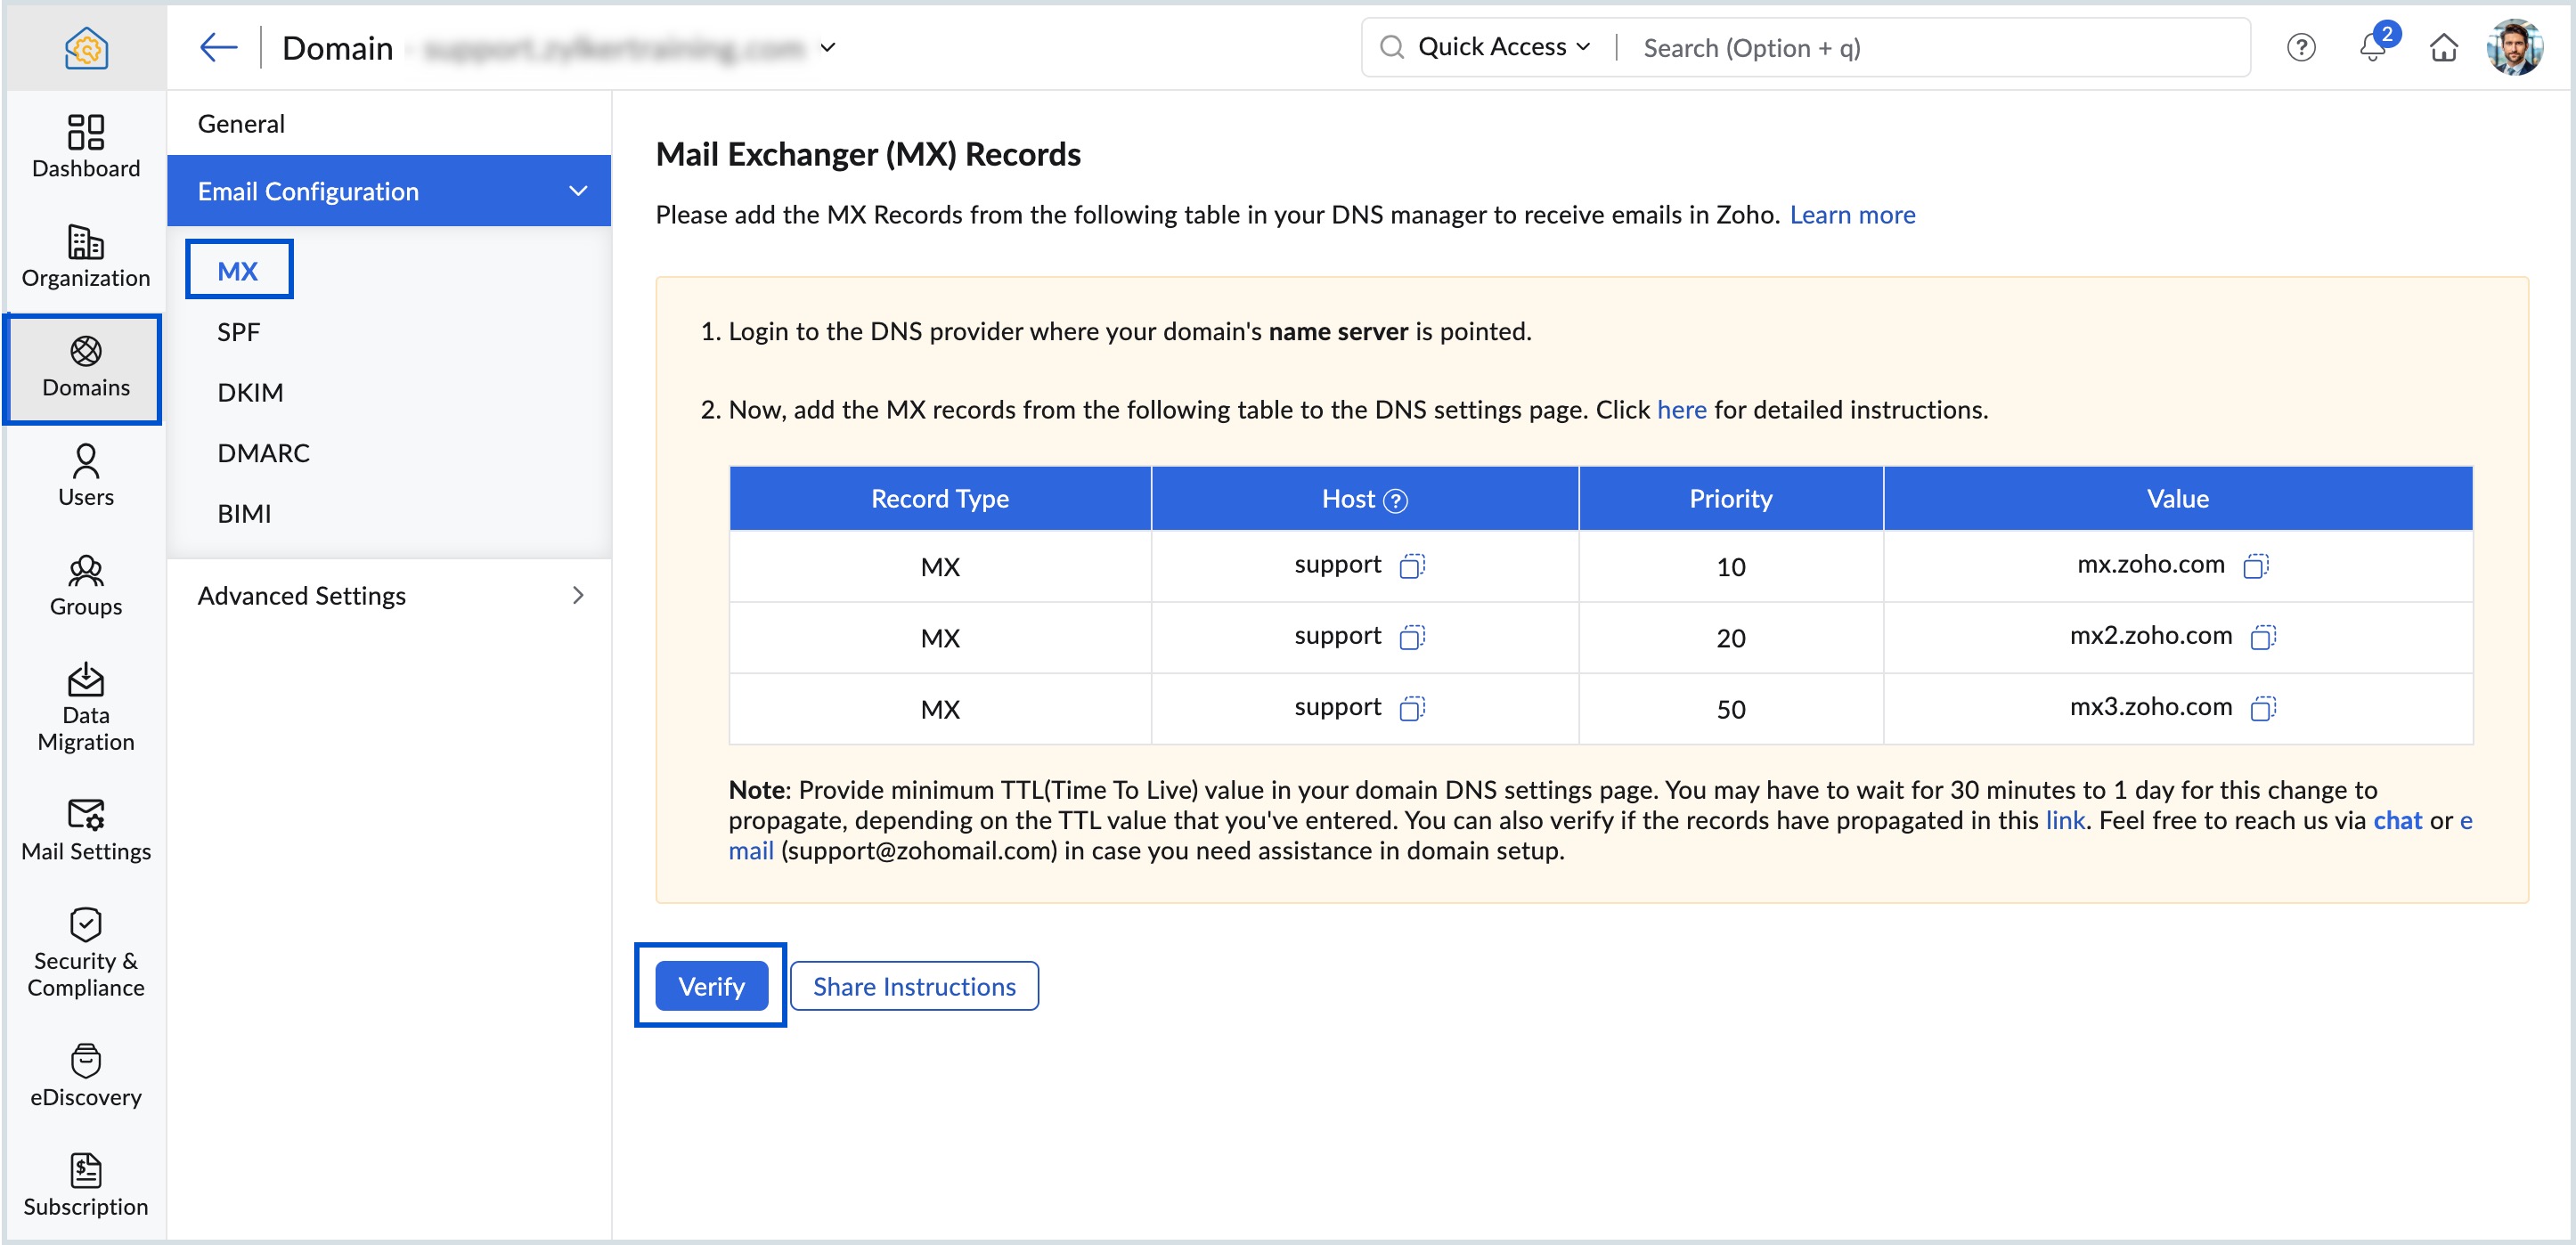
How to Set Up DNS Records in Zoho Mail
- Log in to the Zoho Mail Admin Console.
- Go to the Domains section.
- Select the domain you want to configure.
- Click on MX under Email Configuration.
Follow similar steps to configure SPF, DKIM, and DMARC records.
Verifying these DNS records improves email delivery, increases security, and helps maintain your domain’s reputation and trust.
Related Articles
Zoho CRM : Compliance Made Easy for Email Authentication
We are introducing you with significant updates to enhance email authentication and verification processes across Zoho CRM and other Zoho services. These changes aim to bolster security, ensure compliance with industry standards, and improve user ...Introducing Zoho Service Plus : A unified platform for customer service - Early Access for Partners
We are excited to announce early access to Zoho Service Plus, a unified platform that brings together all of our customer service applications into a single platform. The early access program is exclusive only to partners. With Service Plus, manage ...Zoho Mail - a smarter and quicker emailing experience with Zia's OpenAI integration
11Like7234 OpenAI and ChatGPT have taken the world by storm so much that these are household terms now. Zoho, as always, has embraced this new technology with teams coming up with creative ways to make the most of the generative AI capabilities. Zoho ...Zoho CRM: The Canvas Record Form for Enhanced Customization
Zoho announced Zoho Crm innovation with Canvas functionality now extends to record forms, enabling you to personalize record entries with the power of Canvas! Enhancing CRM Interactions with CanvasIn the heart of any CRM lies the ability to manage ...Zoho Desk: 2-Year Data Analytics in Zoho Desk
Zoho has announced a much-anticipated feature in Zoho Desk. A select group of users now has early access to the "2-Year Data in Analytics - Reports" feature, allowing them to create reports using data from the past two years. Enhanced Reporting ...